2 Usage
2.1 Bought from DotLab
How to use the Open DoVision if you brought it from DotLab somehow?
2.1.1 Prepare
Generally, if you brought the Open DoVision from the DotLab, you will get at least following parts:
- LCD Display
- LCD Controller Board
- Sensor Board
- Fresnel & Glass Lenses
- Power Adopter
- Cables
- Elastic Bands
- Plastic Parts
The electrics will be installed by us and you only have to add elastic bands and lenses to it.
- Find the plastic part looks like this:

It's called LE.
- Thread the elastic bands to the LE like this:

- Find the plastic part looks like this:

It's called T1.
- Thread the other ends of elastic bands to the T1 like this:


- Adjust the length of the elastic bands to get a comfortable feeling.
2.1.2 Check(Setup Cables)
To ensure that there are on problem with your Open DoVision, we suggest you follow the instructions below:
- Just plug in the Power Adopter. You should see the LCD display turns blue.

- Plug in the VGA/HDMI/AV Cable at your choice, and the LCD should turns to the image of your PC background image.

- Plug in the USB Cable. The mouse now should move with the movement of the Open DoVision.
If all above phenomena happen, your Open DoVision is ready!
If unfortunately something when wrong, please go to the Trouble Shouting section.
2.1.3 Lens
All kinds of lenses can be used to get Open DoVision working.
You will get two kinds of lenses:

- Fresnel Lens
- Glass Lens
the Glass Lens can be fixed to the Open DoVision using Lens Fixer


After you can apply multiple fresnel lenses to one eye.

 Test them, and find the best arrangement for yourself!
The final assembling goes to the 2.2.4
Test them, and find the best arrangement for yourself!
The final assembling goes to the 2.2.4
2.1.4 Use
Just open a game that support side-by-side stereoscopic rendering, and put on the headset!
2.2 DIY
2.2.1 Prepare
If you want to make a Open DoVision yourself, you should go to following websites for more information about the specific parts you are making:
- Thingiverse All the plastic parts
- GitHub Firmwares for the sensor board
Go to the Open DoVision x.x in Thingiverse and download all the models and print it out use your 3D printer.

And buy some stuffs:
- HJ070IA-02D LCD Screen Panel Display
- PCB800182 Signal Converter
- T.VST29 Controller Board
- STM32F3DISCOVERY Sensor Board
- mini-USB to USB Cable
I know that finding the right parts will probably be a nightmare, so we make a Extension that give you full ability to use the parts you want! Please scroll down to the Extension section for more information.
And check again:
2.2.2 Sensor Board
Now, to make the Sensor Board ready to use, please go to GitHub and download the .bin file in the usb-mouse folder, or other versions in other folders, and download STM32 ST-LINK Utility from ST.
...Or you can use the source files on the GitHub to make the project and get the binary file yourself.
- Open the STM32 ST-LINK Utility
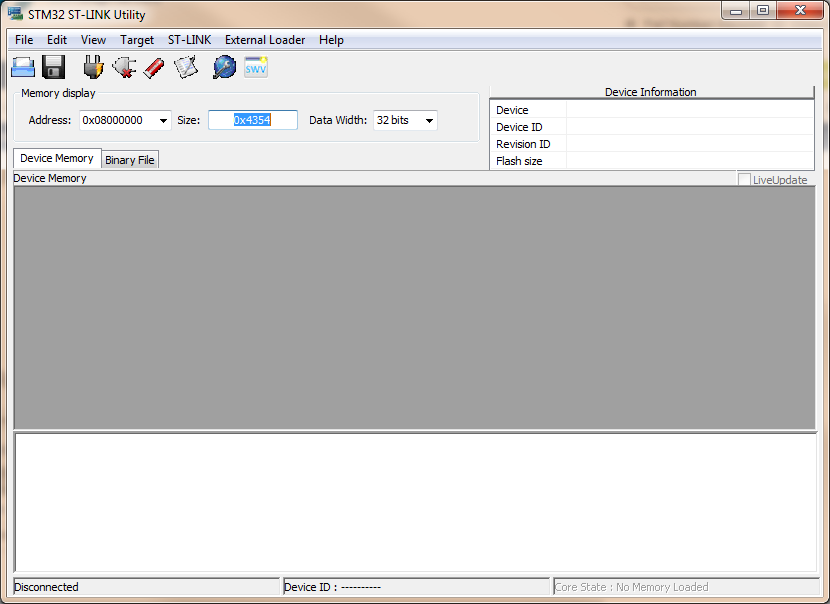
- Load the binary file

- Plug the USB cable to the STM32F3DISCOVERY's debug port and your PC

- Connect to the target and Program Verify

- Disconnect from the target and unplug the USB cable from the debug port.

To test it, just plug the USB cable to the user port of the STM32F3DISCOVERY and move it to see if the mouse is moving as STM32F3DISCOVERY moves. If it is, the sensor board is ready.
And, in order to conserve more room, it is recommended to cut of long pins:


And, in order to conserve more room, it is recommended to cut of long pins:
2.2.3 Electronics
Plug the cable like this:

Plug in the Power Adopter to see if the screen goes blue, if not there must be something wrong.
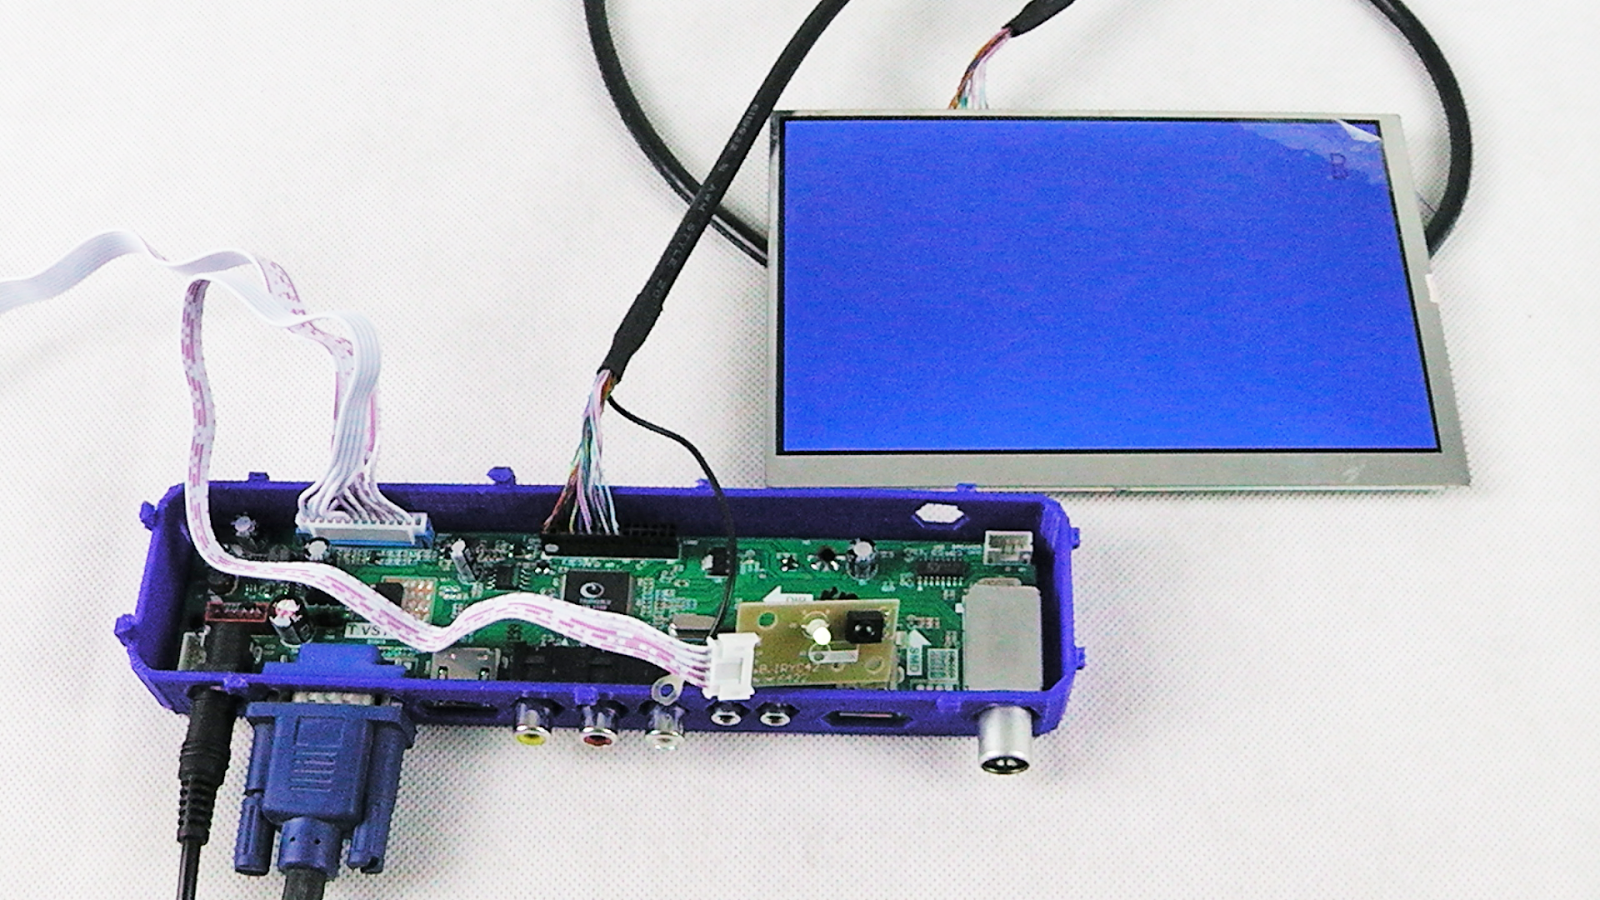
Connect the cables like this:

Plug in the VGA/HDMI/AV Cable at your choice, and the LCD should turns to the image of your PC background image.
Plug in the USB Cable. The mouse now should move with the movement of the Open DoVision.
All done! Your DIY Open DoVision is ready to use!
Note that when installing the screen, I recommend you to follow steps below:


2.2.4 Case
Slide in the T1 to the SC.
 Stack the T2 onto T1.

 Fabricate the elastic bands to the LF and T1 as told in the 2.1.1
Done!
Fabricate the elastic bands to the LF and T1 as told in the 2.1.1
Done!
2.3 Super DIY
If you can edit 3D model, you can try for Super DIY, which DIY the case according to the needs.
Go to Thingivers find Open DoVision OR x.x, get models, and then you can adjust the position of each part as you need,
 or change the height of some parts to fit in with your parts.
 And then, you can have your own parts printed.
No comments:
Post a Comment